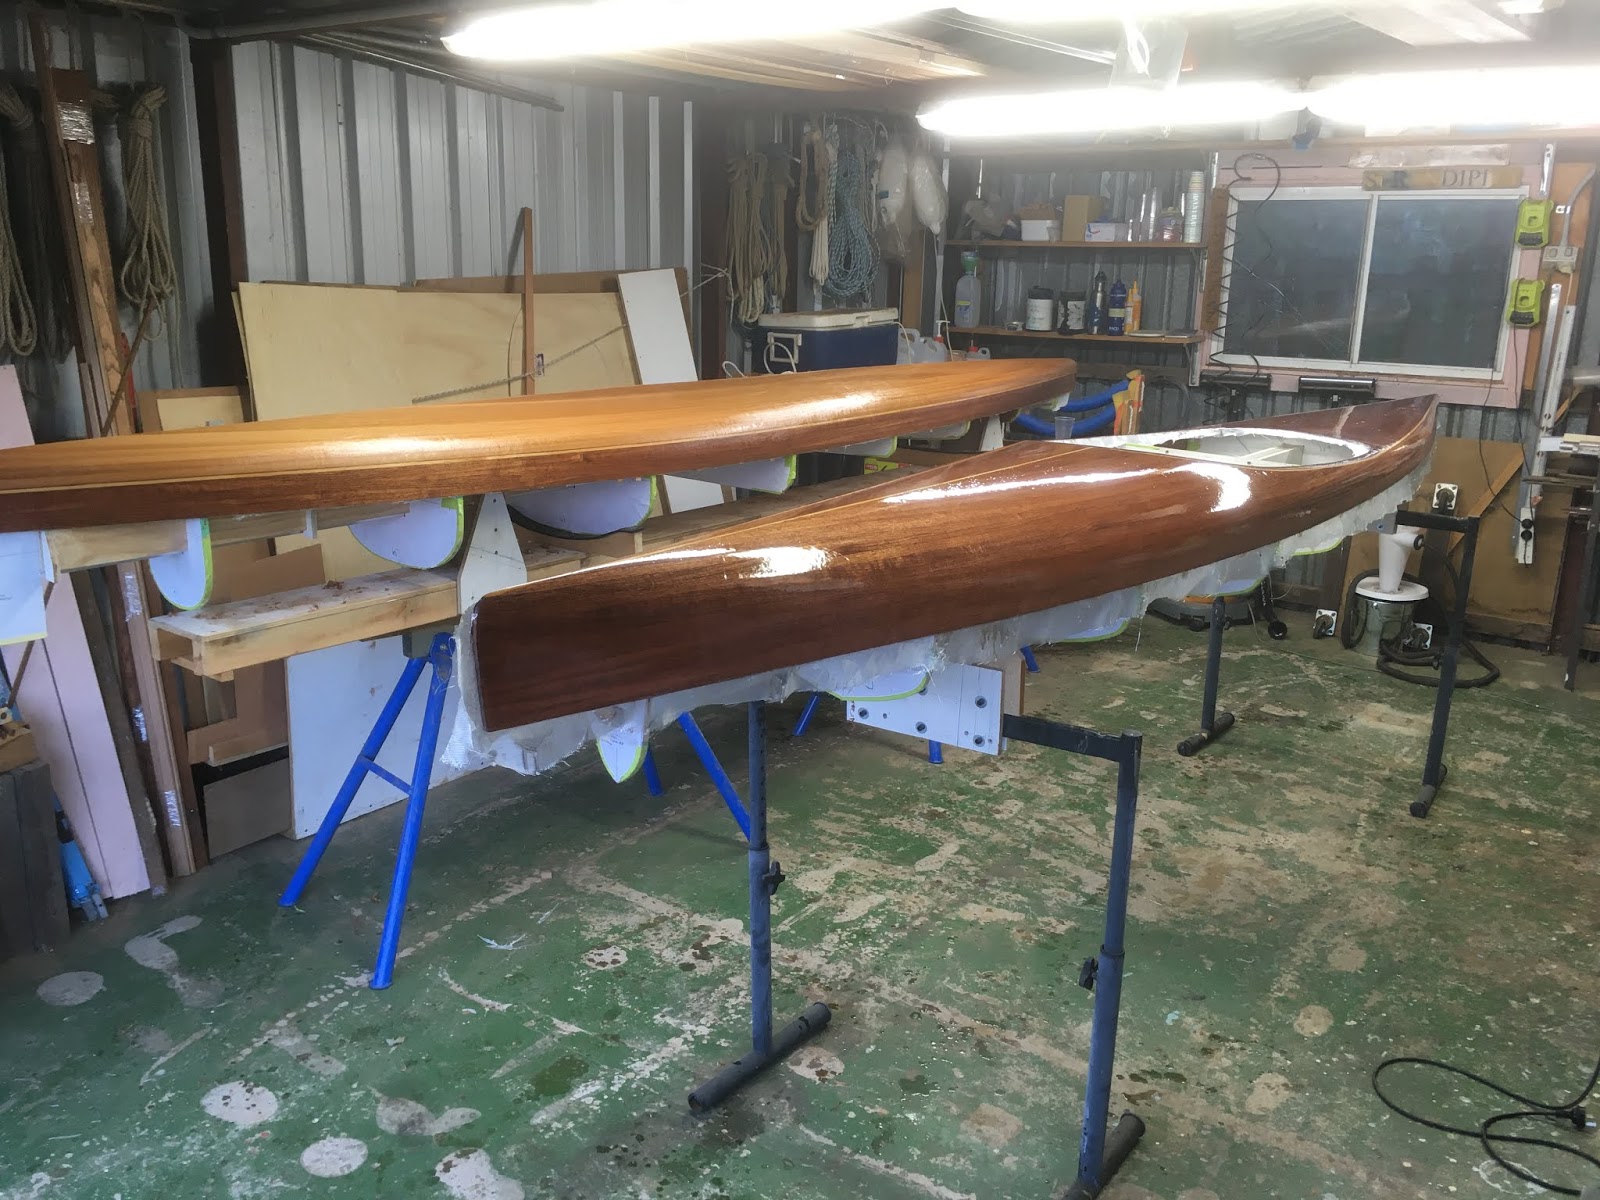
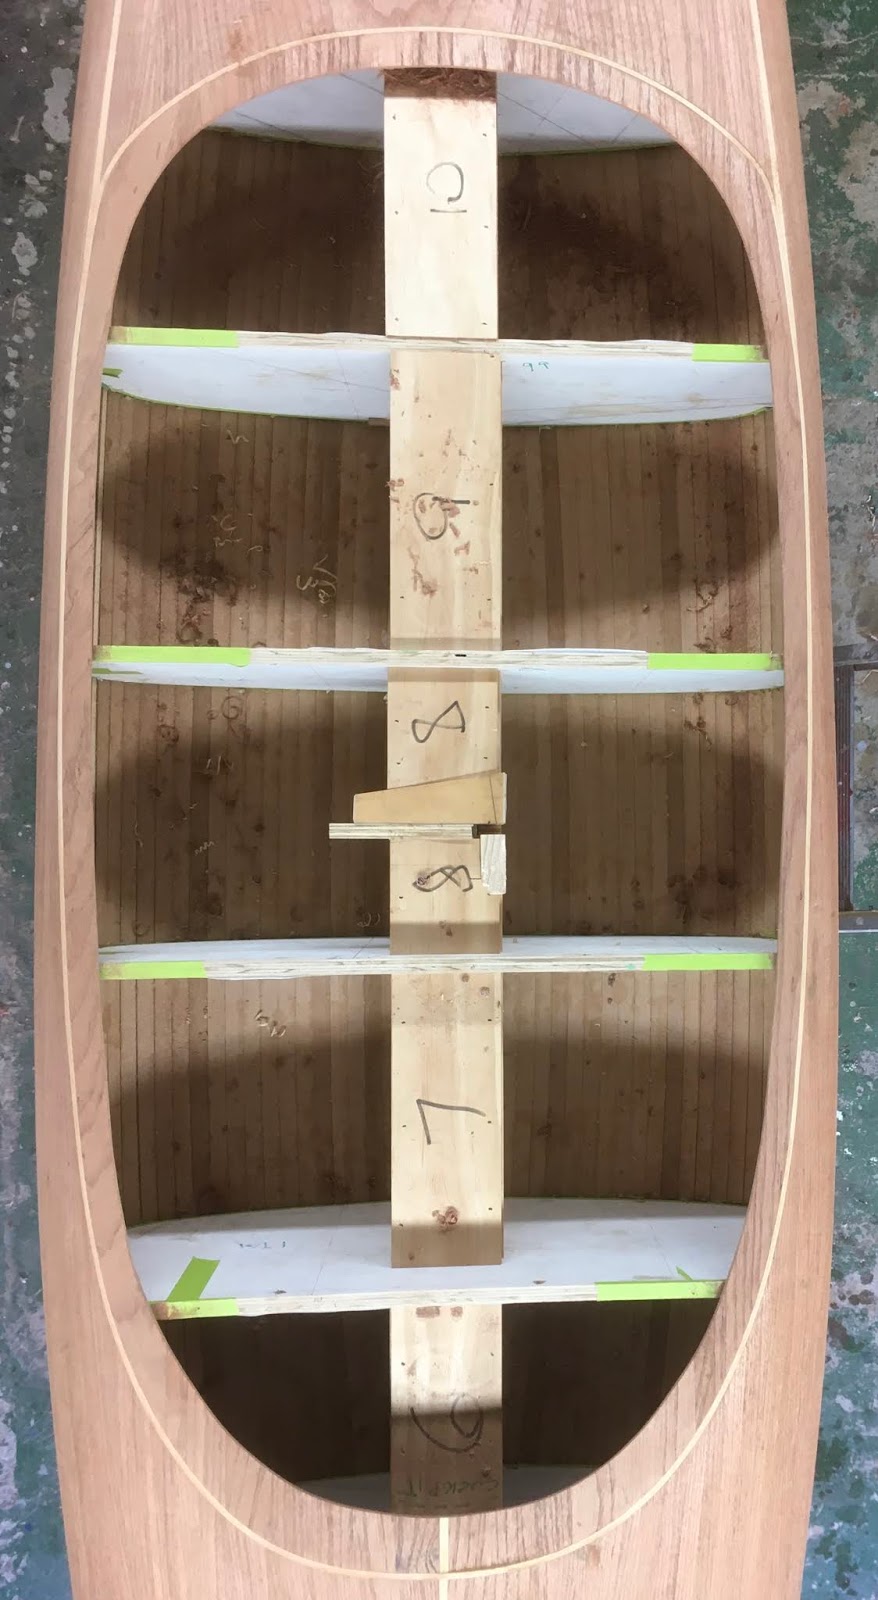
This blog describes my build of a Solo microBootlegger kayak as designed by Nick Schade of Guillemot Kayaks. Before I get into the nitty-gritty of this project I'd like to explain how I reached the decision to build this kayak. Back in 2011 I built an Acorn 15 rowing boat which I enjoyed rowing and still do. Time passed and I wanted a small boat the would fit inside ny 4x4 and be light and easy to carry; this was a Water Rat. I enjoyed rowing and thought I would try a rowing skiff with a sliding seat so I built a Derwent Skiff. This was a lovely boat and I enjoyed using it but my aging back couldn't handle the increased load caused by using my legs so I was back to rowing the Acorn 15 and paddling the Water Rat. Where I paddle regularly on the Brisbane River there is a small group of enthusiastic paddlers in a variety of kayaks including a beautiful kayak made by Struer.. Watching these guys started me thinking about building a longer paddle craft similar in appearance to the Struer. I was concerned about two things; could I manage the lifting involved in transporting a long boat on top of a car and would I enjoy it. I decided to build a quick and easy, low cost, stitch and glue kayak - a Chesapeake Light Craft CLC 16 - before I began a longer term, more difficult, higher cost strip built kayak. to test the water. I built the CLC 16 and found that I could handle it and enjoy using it but found the keyhole shaped cockpit opening was too small for my long and not so bendy legs (I made it bigger).

So, that's the background to my decision to build Nick Schade's Solo microBootlegger. Here's a picture of one that I found on the Internet.

this is an image added to the cross column

this is an image added to the cross column
Isn't it a beautiful shape! Now read on.

Sunday, 14 June 2020

The Coaming and Other Stuff.

With the outside glassed the next job was to build the coaming. After giving the edge of the opening in the deck a final clean up I started putting the vertical riser strips in place. These are pieces of spare deck strips about 50mm long glued in place one at a time. Starting at the centre front the first strip was glued in place with hot melt glue and then the next strip was glued to it with PVA glue and held in place with hot melt glue. This strip by strip process continued until the half way point was reached. Then the second half was done working from the centre back. The final strip on either side needed to be shaped to fill the gap on either side. Here are the first few strips in place.


It took a couple of hours but here's what it all looked like. The top edge was trimmed and the outside sanded smooth.


Masking tape in place ready for fibre-glass (bias cut strips of 4 ounce cloth) to be added.


With fibre-glass done.


The excess cloth which overlapped the masking tape was cut with a sharp utility knife and removed with the masking tape. Next morning the excess cloth was trimmed at the top of the risers. The coaming rim was made from 9 x 2mm thick laminations which were put in place over a layer of plastic wrapping film. Once they were in place and correctly aligned the clamps were removed in sections and the top surface of the laminations painted with epoxy heating the strips before and after the epoxy is applied. The clamps were replaced with extras and the next section done. A gap was left at the front of the opening.


All done, lots of clamps!


Next morning the lip was removed, laid on the bench and the underside sanded smooth before applying a layer of cloth.
 
Next day the excess cloth was trimmed off , the edges of the lip cleaned up and then the lip was put back in place. With the height checked and the lip eyeballed for fairness the lip was spot glued with CA glue every 25mm or so. Again lots of clamps while doing this.

The ends at the front were cut off and tidied up with a plane. Nine short strips were clamped in place and flooded with low viscosity CA glue. The advantage of CA glue is that a squirt with accelerator make it set instantly so work can continue.


Here's a photo of the completed coaming.


The inside of the hull and deck can now be fibre-glassed. I did the hull first to get some practice laying cloth on the concave surfaces.  It looks a bit blotchy but I think it will be OK.


Before the inside of the deck can be covered the coaming was covered in bias cut strips. This was tricky! The inside and top of the coaming were painted with resin and the cloth strips put in place against the risers. once in place the cloth was saturated, first on the vertical surface of the risers, then across the top of the lip and finally over the edge and under the lip. That was the tricky bit but eventually it was done. The deck was turned over and the lower edge of the strips of cloth wet down on the inside surface of the hull. After that glassing the inside of the hull was relatively easy. The next photo was taken the following day. It looks OK but there are blobs of epoxy where it ran down the inside of the riser, easy to clean off when it is hard.


While working on the above there was quite a lot of waiting time so I worked on shaping the seat. The bulk of the work was done with the angle grinder using an abrasive disk called a "Holey Galahad". The disk is shaped like half a doughnut and can be seen in this photo of the seat.


Shaping the inside of the seat was relatively easy, the surface could be checked for smoothness with the hand and shape with the backside. Shaping the outside is more difficult, the hand can feel lumps but the the thickness is more difficult. Closed the edges finger and thumb can gauge the thickness but towards the centre it is harder. I'm still working on it.

I will mount the seat and foot braces on sliders on a rail fixed to the bottom of the boat. The rail will be T shaped with holes for adjustment every 50mm. Here's the current state of the rail. The holes were drilled 16mm without breaking through, then countersunk and filled with epoxy thickened with a mixture of graphite and micro-fibres. When the resin is hard the top surface will be cleaned up and the holes redrilled 12mm right through.


Last job today was the end pours in the deck. These are blocks of epoxy inside the ends of the deck to provide reinforcing where holes for rope handles will be. I shaped a dam from an old ice cream container  and taped it in place. The space behind it was filled with thickened epoxy. Needless to say, one of the dams leaked causing a sticky mess! I scooped up the epoxy and clean the surface, put the dam back wit more tape and poured the epoxy back in. This time it's holding, I hope!

The stern.

The bow, this is the one that leaked: obviously, it's harder to get at!


Wednesday, 27 May 2020

Fibreglassing.

It's been a frustrating few weeks since the last post finishing the sanding process and getting ready to fibreglass the outside of the hull and deck. In the last post I had sanded the whole hull twith 60 grit paper to level the surface out. The next step would be 80 grit on the randome orbital sander and longboard. I wanted a soft pad for the random orbital sander and it took a while to find a source. I bought the last two in stock, 15mm thick, 150mm diameter with no holes. My sander is 125mm so I had to cut some off and punch some holes in the pad. Here's a photo of the result, looks quite good.


After les than 2 hours sanding with the 60 grit paper and being careful when chnging to a new sheet of paper the pad delaminated! Some discussion with the supplier about this and they agreed to replace the pad - but I had bought the last two in stock so I'm waiting! I glued it back together with spray on contact cemeent and it is holding together.


I wanted to collect some of the sanding dust and so bought a small cyclone and mounted it on a plastic bucket. I looked quite good and worked well but the vacuum was too much for the bucket which collapsed!


I tried various plastic buckets but the all failed. Eventually I bought a heavy duty steel bucket and mad a wooden lid. This withstands the vacuum and collects the dust but needs more work to tidy it up.

While waiting for things to arrived by post I started working on the seat. It is laminated from shaped pieces glued together to make a blank. Here it is before any finishing is done on it.


With the outside sanded to 120 grit several cracks between strips needed to be filled. there were a number of fine cracks which will fill with epoxy and not be noticeable. Here's a wider one.


Filling the narrow crack with wood would be difficult. Filling it with bog would show up as clearly as the crack/ The solution (thanks Nick Schade) is to make the crack into a wider V shaped groove and glue astrip of matching timber into the groove.


Cutting a strip of western red cedar 3mm square was a bit of a challenge but I did it and here it is glued into place with the excess planed off. After sanding it looked even better.


The tools for doing this are: veining gouge on the left, Japanese rasp centre and coarse square file on the right. The filler strip was glued in with CA glue and accelerator.


Sanded to 120 grit the surface looked OK but when sprayed with water to raise the grain some PVA glue squeeze out could be seen. The PVA dries clear and is hard to see and, because it has been sanded flat, your fingers don't feel it. Here some PVA on the edge of a strip which is slightly lower than its neighbour.  A freshly sharpened block plane  cleaned these up


Once satisfied with the surface I removed the two halves of the hull from the building frame, very carefully because they feel like eggshells and wouold be easily damaged.

I took the building frame apart and divided the frames between two strongbacks, half the frames on each. This photo shows one strongback with half the frames in place.


The next photo shows the two strongbacks withe the top and bottom halves in place. The shells are tacked to the frames with hot melt glue.


With the halves ready for fibreglass the weather took a downward turn as Brisbane headed into winter. we are having maximum temperatures around 25C and the isn't reached until mid afternoon. Not really warm enough for fibreglassing. My workshop is a metal shed and attempts to warm it up with electric heaters failed completely. One 2kW electric fan heater had no effect; two of them tripped the breaker! In the end I bought a small industrial gas heater which puts out 15kW. It was cheap and has no temperature control - just on of off! In half an hour it raises the temperature in my shed up to the high 20s and the resin is happy! I just have to be careful what it is pointed at.


Two days later and the fibreglassing is done. My intention was to do it all in one day but the shopping expedition to buy the yellow heater above delayed me enough for common sense to prevail. over the rest of the first day I put the cloth on both halves and wet out the bottom half (hull). When this had dried to the just tacky stage I squeegeed another thin coat on. I gauge the just tacky stage with a cotton bud; if fibres are pulled away from the ball the surface is ready, if no fibres are pulled away the surface is still too wet. here's what it looks like.


On the second day I turned on the gas heater early and switched on the light bulb in the esky to warm up the epoxy then went and had breakfast.  An hour later both shed and epoxy were warmed up so I wet out the cloth with a squeegee plus a brush for the small vertical areas at stem and stern. With it all wet out (no white areas and even colour) the excess epoxy was scraped off with the squeegee into a grunge cup. Like the hull a thin fill coat was squeegeed on when the surface was ready. The deck gets a third heavier coat brushed on to build up towards the final finish. After the deck and hull are joined together the hull gets another layer of cloth which overlaps the join  sealing it on the outside. To prevent an excessive thickness of resin along the edge of the hull a strip about 32mm needs to be masked off. Nick Schade uses "flash" tape for this, regular making tape would get stuck to the surface. I didn't know where to get any of this flash tape so I cut some strips of peel ply and laid them along the edge while the first fill coat was still wet. The heavy coat was brushed on and then warmed up with a hot air gun to help level it out and to pop any bubbles. An hour or so later the peel ply was removed.


Time for a beer!


Tuesday, 5 May 2020

The Aft Deck and Coaming Recess.

The aft deck took less time than the fore deck because it was mostly wider strips.  To begin I marked and cut the edges where I wanted to add accent strips. While I was cutting these accent strips I also 

took out the 105x8mm offcuts from the wide board of Surinan Cedar - see post of March 28th below. These were run through the thicknesser to bring them down to 4.8mm. With that done I laid them out on the bench and selected the pattern I wanted for the aft deck and cut long enough pieces from each of them. These wide pieces were ripped into strips 32mm wide to use on the deck.

The edges of the deck were cleaned up with a plane and the accent strips glued to each edge. When this glue was dry I added another two narrow strips to each edge to proved a marging. Then onto the wider strips. The first two were laid along the centreline of the deck. Followed by more strips one either side until the deck was complete.


At this point it looks as if the boat is being built out of green tape!


But it isn't. The grain pattern I was after is clearly visible.


With the hull completely stripped it was time for the first scraping and sanding session. First scraping off the hot melt glue stitches and squeezed out PVA. Then the sanding. Starting with 60 grit on the random orbital sander and then going over the entire surface with a home made long board. With the deck done I turned the boat over and repeated the process on the bottom. This isn't very photogenic but here are a photo of the tools and the finished surface.


While I was doing the sanding I laid out and glued some strips to make the coaming recess. I drew the rough outline on a piece of scrap ply , covered it in clear plastic and the glued up the strips over it. When the glue dried I turned the whole piece over, scraped and sanded the surface and then covered it with 120 GSM fiberglass cloth. This was left for about 48 hours and then sanded using 80, 60 and 120 grit paper. Here,s the recess resting on top of the boat. The green tape was peeled off and the outside surface scraped and sanded.

I was nervous about the next stages which would involve fitting the coaming recess into the boat complicated by my wanting to put an accent strip between the hull and the recess panel.

After sleeping on the issues involved in doing this I woke early and went for a paddle on the river.


Here's the panel taped in place so I can reach inside and mark the edge of the hole - before adding the accent strip so there is a margin for error.
I added the accent strip in two laminations each about 2.5mm thick; any thicker and I couldn't get them round the sharper corners at the aft end (top of the photo) without steaming them. The strips are hoop pine and it doesn't steam nicely anyway. I wasn't game to try adding them both in the same glue up so did them in two sessions. The ends are overlapped in a scarph joint.
Then there was the long fiddly job of fitting the the recess into the hole. I don't think there is an easy way to do this and so crept up on the final fit with plane and sandpaper on a board.  Then glued in in place with the last of the green tape for a while. 
An hour with the scraper, block plane and 60 grit sand paper on a board the the jobs done. it isn't perfect but there is only one gap that needs a bit of filler - "bog" in Australia or "dookie-smutch" in the USA.

I think it turned out OK and I guess that it will become easier after another boat or two!

Next is more sanding over the whole hull getting ready for the outside fibre-glassing.

Saturday, 25 April 2020

The Fore Deck

With the bottom completed it was time to turn the boat over. I'm not strong enough to lift the boat and building frame and due to the Corona Virus couldn't round up a helper or two so I had to resort to block and tackle and pulleys. I've done this before with much heavier boats (~300 kg)  so had all the necessary bits and pieces to hand.  Here it is, hanging in the slings . The strips spanning the formers were to stop the slings crushing the edge of the strips inwards.


I had made three cradles to support the boat while the deck strips were added.


A number of jobs had to be done before stripping started. The spacers between the frames were loosened on the strongback and knocked sideways with a hammer to break the hot melt glue joints. I was surprised how tenacious the hot melt glue was but it all came free eventually. The wedges were put back in to reposition the frames and I checked that he frames were aligned along the part line and keel. Most were but a couple had to be knocked back into place. The inner stem and stern were cut along the part line. I lifted the bow end of the strongback to make sure that the bottom half of the boat was free and would eventually come off. Replaced the masking tape on the frames with less shiny tape hoping that t he hot melt glue would stick better. Hot melt glued to edge strip back to the frames.

I started stripping up on both sides; full length strips to begin with until the top of the stern was reached. Then continued with shorter strips - reaching back to the coaming opening - until the top of the stem was reached.

It was about this point that my 6 week old hot melt glue gun burned out iits heating element. I hope to get it replaced under warranty but have ordered a new gun and some sticks specifically for gluing wood, maybe this glue will work better than the unspecified glue I had been using. Here's the dead gun, there doesn't appear to be any temperature control at all and I suspect it just overheated when I left it turned on for a couple of hours.

I was a bit despondent over the dead glue gun but an early morning paddle on the Brisbane River near home raised my spirits again. The river is steaming because the air temperature was about 12C and the water about 20C. Very pleasant paddle in my CLC 16.


Stripping continued on the starboard deck until the centreline was reached.


When the PVA glue had dried overnight I marked the centreline and sawed off the excess and planed the edge back to the pencil line then eyeballed and trimmed it until it was straight.Then I had to plane it further back by half the width of the accent strip. Then glued the accent in place.


Strips were added on the port side fitting them carefully against the accent strip. This took longer that the starboard half where there was no fitting but it still went fairly quickly. Here's what the front half of the boat looks like now.

.Next is the aft deck, accent strips first the fill in with strips. There are a few different ways of stripping the aft deck so I will have to think about that.

Friday, 17 April 2020

The Whisky Strip.

At the end of the last post all the strips were on the port side bottom. The next step was to cut the ends back to the centre of the keel. The line was marked at each station and a straight line drawn through these points.  It's important (as usual) that the line is straight rather than simply joining up the dots so there is a lot of eyeballing needed. I cut the ends off with a Japanese pull saw and carefully planed the edge to be straight and vertical.

The main tools used to shape and fit strips are pretty basic. The secateurs might be a surprise to boat builders but they do an excellent job of cutting strips to length quickly and cleanly. The Stanley knife is used to hack off the excess when tapering the end of the strip. The block plane (sharp!) trims the taper until it fits. If you go looking for secateurs to do this you need the type with an anvil and a straight blade; the curved blade type split the end of the strip.

The first taper is fitted and the strip put in place temporarily, a couple of witness lines are drawn at the other end of the strip which is then pulled back slightly before marking the taper. When the taper fits nicely it is trimmed back a little at a time until the witness lines show it is the correct length. Then it is glued in place. Strips of tape hold it tight against the previous strip and small blobs of hot melt glue hold it down onto the frames where needed. Stitches of hot melt glue are added along the join so the tape and clamps can be removed ready for the next strip.

This is what it looks like at the end of two sessions. while the strips are long er they are easy to put in place. One end is positioned and the the centre of the strip can be lifted  bringing the other end in so that it can be put in place. Finally the centre part of the strip is put down against its neighbour and taped in place.

As the strips get shorter this process gets more difficult. Shaping them is the same but springing them into place just seemed to get more difficult to me.

At this point there are two and a tiny bit strips left to go strips left to go. Rather than try to make a tiny strip I glued two strips together to make the final strip from. However, after I added the second last strip I found that the extra tiny bit wasn't needed.


Here's the gap and the last shaped strip ready to be fitted.


This last strip is called the Whisky Strip because it marks the completion of the hull on a traditional boat and is therefore a cause for celebration. I think I have earned this!


There are actually more strips still to go on the top of the boat so perhaps the celebration is  premature but I enjoyed it!

Saturday, 11 April 2020

First Half of the Bottom Done.

After adding a couple of strips below the waterline I was approaching the chine. It isn't a sharp corner but on some frames it has a small radius. I thought about cutting a few strips in half so the narrower strips would better fit around the corner. In the end I continued with the 16 mm strips and think I got away with it. towards the stern I had to bevel both strips to get a good joint.

As the ends of the strips passed the centre line they became shorter and easier to fit particularly on the flatter section of the bottom. A quick swipe with the Robo Bevel ensure a good fit for the next strip. Here's a photo at the start of the day after the previous days clamps and tape had been removed.


In the next photo another strip has been fitted. The tape is closing up the joint until the glue takes hold which might take a couple of hours. The spring clamps are holding slotted pieces of plywood to hold the strip down.

The tape and clamps can't be removed until the glue has set enough to hold the strip. To speed things up hot melt glue "stitches" were used to hold the joint together. The stitches are simply blobs of hot melt glue placed across the join every 60 or 70 mm. These hold the join together and allow the tape and spring clamps to be removed. This speeds up the process a lot allowing a couple of strips to be added in an hour.
Here's a photo with all the port side strips in place. Tomorrow the centre line will be marked and the excess material cut off with a hand saw and the cleaned up with a plane.


Monday, 6 April 2020

Adding Strips.

The boat is being built upside down: the first strip is put on at the part line (where the hull and deck sections are joined) and the following strips work upwards towards the water line where I intend to change colour from dark to lighter strips.

The part line in this boat is straight and to get the first strip in the correct position I clamped a short piece of strip against the part lines and centre line on the forms. The forms were adjusted up, down and sideways until all these short strips lined up. A strip resting on the short strips helped with this process.

When I was satisfied with the setup I glued the first strip to the end pieces at the stem and stern and tacked it in place at each form with a small blob of hot melt glue.


The edge of this strip was beveled with the Robo-Bevel tool and the second strip was glued to it.


The green tape clamps holding the strips together worked well and more hot melt glue was used where necessary to hold the strips against the forms.

I noticed that the hot melt glue wasn't sticking well to the green (Bear brand) tape so I tried some tests with scraps of strip material. I had another roll of green tape (Scotch brand) so I tried both and found the Scotch brand tape was slightly better. I thought the surface of the tape was slightly waxy and so wiped it with acetone. The glue bond was better on both tape. Coincidentally with this I found a list of tools and materials below one of Nick's YouTube videos. The green tape he uses in Scotch brand and is specifically for rough materials so I put this on my shopping list.

I added more strips until I passed the waterline. The last strip (number 5) then had to be cut back to the waterline. A simple tool is used to transfer the line from inside to outside. A mark is made on the outside of the strip.


A strip was clamped in place at every second mark, above the marks so the clamps would not interfere with drawing a continuous line joining the dots. This strip was adjusted and eyeballed until it was straight and a line drawn.

I cut off the excess with a Japanese pull saw and then planed it down to the line. I found planing quite difficult, particularly past the forms. The first stage in the planing is to get the edge straight and level. I used a Veritas Bullnose plane (blade right to the edge of the sole) with my fingers acting as a fence. This worked but was not ideal. There must be a better way! With the edge leveled and straight (eyeball) the Robo-Bevel was used to add the necessary bevel  but taking care to keep the outside edge straight.

I wanted to add an accent strip along the waterline.  I had some hoop pine (almost white) for this and cut some strips 6mm wide. To separate the white hoop pine more clearly from the light coloured cedar I added a 1.5mm strip of the darker material. Cutting this narrow strip was tricky because it was very fragile. I lowered the saw blade, put a strip on the saw table and clamped a piece of scrap pine to the fence to hold the strip down. With the strip removed I raised the rotating saw blade until it cut into the pine hold down. This worked well with a finger board to hold the strip against the fence.


I glued the white strip in place, applied glue to it and put the narrow dark strip on. Added tape clamps and stopped work for the day.

With two more light coloured strips added here's what it looks like. In time I will know whether this accent strip is a success or not!


Adding the strips one the chine was tricky because the bevel is quite pronounced where the turn has a sharp radius.  There isn't a hard corner at the chine but at some stations the radius is small. I think I have got it right. Stripping from here to the centre line should be easier.