This blog describes my build of a Solo microBootlegger kayak as designed by Nick Schade of Guillemot Kayaks. Before I get into the nitty-gritty of this project I'd like to explain how I reached the decision to build this kayak. Back in 2011 I built an Acorn 15 rowing boat which I enjoyed rowing and still do. Time passed and I wanted a small boat the would fit inside ny 4x4 and be light and easy to carry; this was a Water Rat. I enjoyed rowing and thought I would try a rowing skiff with a sliding seat so I built a Derwent Skiff. This was a lovely boat and I enjoyed using it but my aging back couldn't handle the increased load caused by using my legs so I was back to rowing the Acorn 15 and paddling the Water Rat. Where I paddle regularly on the Brisbane River there is a small group of enthusiastic paddlers in a variety of kayaks including a beautiful kayak made by Struer.. Watching these guys started me thinking about building a longer paddle craft similar in appearance to the Struer. I was concerned about two things; could I manage the lifting involved in transporting a long boat on top of a car and would I enjoy it. I decided to build a quick and easy, low cost, stitch and glue kayak - a Chesapeake Light Craft CLC 16 - before I began a longer term, more difficult, higher cost strip built kayak. to test the water. I built the CLC 16 and found that I could handle it and enjoy using it but found the keyhole shaped cockpit opening was too small for my long and not so bendy legs (I made it bigger).

So, that's the background to my decision to build Nick Schade's Solo microBootlegger. Here's a picture of one that I found on the Internet.

this is an image added to the cross column

this is an image added to the cross column
Isn't it a beautiful shape! Now read on.

Saturday, 25 April 2020

The Fore Deck

With the bottom completed it was time to turn the boat over. I'm not strong enough to lift the boat and building frame and due to the Corona Virus couldn't round up a helper or two so I had to resort to block and tackle and pulleys. I've done this before with much heavier boats (~300 kg)  so had all the necessary bits and pieces to hand.  Here it is, hanging in the slings . The strips spanning the formers were to stop the slings crushing the edge of the strips inwards.


I had made three cradles to support the boat while the deck strips were added.


A number of jobs had to be done before stripping started. The spacers between the frames were loosened on the strongback and knocked sideways with a hammer to break the hot melt glue joints. I was surprised how tenacious the hot melt glue was but it all came free eventually. The wedges were put back in to reposition the frames and I checked that he frames were aligned along the part line and keel. Most were but a couple had to be knocked back into place. The inner stem and stern were cut along the part line. I lifted the bow end of the strongback to make sure that the bottom half of the boat was free and would eventually come off. Replaced the masking tape on the frames with less shiny tape hoping that t he hot melt glue would stick better. Hot melt glued to edge strip back to the frames.

I started stripping up on both sides; full length strips to begin with until the top of the stern was reached. Then continued with shorter strips - reaching back to the coaming opening - until the top of the stem was reached.

It was about this point that my 6 week old hot melt glue gun burned out iits heating element. I hope to get it replaced under warranty but have ordered a new gun and some sticks specifically for gluing wood, maybe this glue will work better than the unspecified glue I had been using. Here's the dead gun, there doesn't appear to be any temperature control at all and I suspect it just overheated when I left it turned on for a couple of hours.

I was a bit despondent over the dead glue gun but an early morning paddle on the Brisbane River near home raised my spirits again. The river is steaming because the air temperature was about 12C and the water about 20C. Very pleasant paddle in my CLC 16.


Stripping continued on the starboard deck until the centreline was reached.


When the PVA glue had dried overnight I marked the centreline and sawed off the excess and planed the edge back to the pencil line then eyeballed and trimmed it until it was straight.Then I had to plane it further back by half the width of the accent strip. Then glued the accent in place.


Strips were added on the port side fitting them carefully against the accent strip. This took longer that the starboard half where there was no fitting but it still went fairly quickly. Here's what the front half of the boat looks like now.

.Next is the aft deck, accent strips first the fill in with strips. There are a few different ways of stripping the aft deck so I will have to think about that.

Friday, 17 April 2020

The Whisky Strip.

At the end of the last post all the strips were on the port side bottom. The next step was to cut the ends back to the centre of the keel. The line was marked at each station and a straight line drawn through these points.  It's important (as usual) that the line is straight rather than simply joining up the dots so there is a lot of eyeballing needed. I cut the ends off with a Japanese pull saw and carefully planed the edge to be straight and vertical.

The main tools used to shape and fit strips are pretty basic. The secateurs might be a surprise to boat builders but they do an excellent job of cutting strips to length quickly and cleanly. The Stanley knife is used to hack off the excess when tapering the end of the strip. The block plane (sharp!) trims the taper until it fits. If you go looking for secateurs to do this you need the type with an anvil and a straight blade; the curved blade type split the end of the strip.

The first taper is fitted and the strip put in place temporarily, a couple of witness lines are drawn at the other end of the strip which is then pulled back slightly before marking the taper. When the taper fits nicely it is trimmed back a little at a time until the witness lines show it is the correct length. Then it is glued in place. Strips of tape hold it tight against the previous strip and small blobs of hot melt glue hold it down onto the frames where needed. Stitches of hot melt glue are added along the join so the tape and clamps can be removed ready for the next strip.

This is what it looks like at the end of two sessions. while the strips are long er they are easy to put in place. One end is positioned and the the centre of the strip can be lifted  bringing the other end in so that it can be put in place. Finally the centre part of the strip is put down against its neighbour and taped in place.

As the strips get shorter this process gets more difficult. Shaping them is the same but springing them into place just seemed to get more difficult to me.

At this point there are two and a tiny bit strips left to go strips left to go. Rather than try to make a tiny strip I glued two strips together to make the final strip from. However, after I added the second last strip I found that the extra tiny bit wasn't needed.


Here's the gap and the last shaped strip ready to be fitted.


This last strip is called the Whisky Strip because it marks the completion of the hull on a traditional boat and is therefore a cause for celebration. I think I have earned this!


There are actually more strips still to go on the top of the boat so perhaps the celebration is  premature but I enjoyed it!

Saturday, 11 April 2020

First Half of the Bottom Done.

After adding a couple of strips below the waterline I was approaching the chine. It isn't a sharp corner but on some frames it has a small radius. I thought about cutting a few strips in half so the narrower strips would better fit around the corner. In the end I continued with the 16 mm strips and think I got away with it. towards the stern I had to bevel both strips to get a good joint.

As the ends of the strips passed the centre line they became shorter and easier to fit particularly on the flatter section of the bottom. A quick swipe with the Robo Bevel ensure a good fit for the next strip. Here's a photo at the start of the day after the previous days clamps and tape had been removed.


In the next photo another strip has been fitted. The tape is closing up the joint until the glue takes hold which might take a couple of hours. The spring clamps are holding slotted pieces of plywood to hold the strip down.

The tape and clamps can't be removed until the glue has set enough to hold the strip. To speed things up hot melt glue "stitches" were used to hold the joint together. The stitches are simply blobs of hot melt glue placed across the join every 60 or 70 mm. These hold the join together and allow the tape and spring clamps to be removed. This speeds up the process a lot allowing a couple of strips to be added in an hour.
Here's a photo with all the port side strips in place. Tomorrow the centre line will be marked and the excess material cut off with a hand saw and the cleaned up with a plane.


Monday, 6 April 2020

Adding Strips.

The boat is being built upside down: the first strip is put on at the part line (where the hull and deck sections are joined) and the following strips work upwards towards the water line where I intend to change colour from dark to lighter strips.

The part line in this boat is straight and to get the first strip in the correct position I clamped a short piece of strip against the part lines and centre line on the forms. The forms were adjusted up, down and sideways until all these short strips lined up. A strip resting on the short strips helped with this process.

When I was satisfied with the setup I glued the first strip to the end pieces at the stem and stern and tacked it in place at each form with a small blob of hot melt glue.


The edge of this strip was beveled with the Robo-Bevel tool and the second strip was glued to it.


The green tape clamps holding the strips together worked well and more hot melt glue was used where necessary to hold the strips against the forms.

I noticed that the hot melt glue wasn't sticking well to the green (Bear brand) tape so I tried some tests with scraps of strip material. I had another roll of green tape (Scotch brand) so I tried both and found the Scotch brand tape was slightly better. I thought the surface of the tape was slightly waxy and so wiped it with acetone. The glue bond was better on both tape. Coincidentally with this I found a list of tools and materials below one of Nick's YouTube videos. The green tape he uses in Scotch brand and is specifically for rough materials so I put this on my shopping list.

I added more strips until I passed the waterline. The last strip (number 5) then had to be cut back to the waterline. A simple tool is used to transfer the line from inside to outside. A mark is made on the outside of the strip.


A strip was clamped in place at every second mark, above the marks so the clamps would not interfere with drawing a continuous line joining the dots. This strip was adjusted and eyeballed until it was straight and a line drawn.

I cut off the excess with a Japanese pull saw and then planed it down to the line. I found planing quite difficult, particularly past the forms. The first stage in the planing is to get the edge straight and level. I used a Veritas Bullnose plane (blade right to the edge of the sole) with my fingers acting as a fence. This worked but was not ideal. There must be a better way! With the edge leveled and straight (eyeball) the Robo-Bevel was used to add the necessary bevel  but taking care to keep the outside edge straight.

I wanted to add an accent strip along the waterline.  I had some hoop pine (almost white) for this and cut some strips 6mm wide. To separate the white hoop pine more clearly from the light coloured cedar I added a 1.5mm strip of the darker material. Cutting this narrow strip was tricky because it was very fragile. I lowered the saw blade, put a strip on the saw table and clamped a piece of scrap pine to the fence to hold the strip down. With the strip removed I raised the rotating saw blade until it cut into the pine hold down. This worked well with a finger board to hold the strip against the fence.


I glued the white strip in place, applied glue to it and put the narrow dark strip on. Added tape clamps and stopped work for the day.

With two more light coloured strips added here's what it looks like. In time I will know whether this accent strip is a success or not!


Adding the strips one the chine was tricky because the bevel is quite pronounced where the turn has a sharp radius.  There isn't a hard corner at the chine but at some stations the radius is small. I think I have got it right. Stripping from here to the centre line should be easier.


Saturday, 28 March 2020

Cutting the Strips.

Cutting big boards into small strips has taken me a few days and caused a lot of head scratching but fortunately only one reason for using the moaning chair.

I started by putting a 185 mm diameter thin balde in the table saw and making a zero clearance insert.


I found that the blade would only cut about 45 mm thick material and I had a 50 mm thick board so had to change back to the big blade with its 3 mm kerf. Then I cut the 200 x 50 mm board into 8 pieces.


Eventually I realised that I should have put the board through the thickness to get one clean face which would have given the strips a clean face against the fence when I got to cutting the strips. I set these strips aside and went on to the wider boards. At 320 mm wide these would not go through my 300 mm wide thicknesser so I used the big blade to cut them each into three pieces about 106 x 30 mm. Here they are.

These are 30 mm thick and I wanted to cut them vertically into 16 x4.8 mm strips. First step was to clean up one face on the thicknesser so I resaw them into thinner boards on the bandsaw leaving me with about 8 mm thick offcuts which may have some future use.

I put a new 20 mm wide blade in the bandsaw but didn't adjust the blade guides accurately enough. The test cut in some scrap pine looked OK so I tried to cut the first wide cedar board. About a third of the way along the blade wandered off to the wrong side. I readjusted the blades very carefully and tried again. This time it cut straight but I would only be able to get short strips out of this board.

I cut the rest of the boards and then ran them through the thicknesser down to 16 mm. Here they are plus some of what seems like a huge amount of shavings!

Back to the table daw with the small thin kerf blade to cut some strips. What I found next was that it is important to start the whole process with a board that has straight and parallel edges. My 320 mm wide board was rough sawn with edges that were not quite straight and therefore the width varied. I had cut it into three and so had three boards that were quite straight on the rough side - the middle board was almost OK.

The problem I encountered was that I couldn't use a finger board to push the stock against the fence because the stock would jom on the wider parts. I had to cut the strips with a finger board holding them down and hand pressure to keep them against the fence.


Here are photos of the saw setup with both finger boards in place but it didn't work out wee as I said above.


I use the roller infeed table because I have it and need it for the heavier stock. I find the heavy stock will not slide well over fixed supports such as saw horses because I'm not physically strong enough and I don't have a power feeder. The down side of the roller infeed is that no matter how carefully I set it up it tends to steer heavier boards to one side or the other. This makes it harder to keep them flat against the fence. On the outfeed side I have a couple of wide tables set up with ramps to lift the drooping stock up onto them. The ramps are covered in waxed paper (a tip from Nick Schade) which worked quite well.

 This worked OK but was hard work and I was ready for a beer when they were all done. Each of the 6 boards gave me 15 strips Which I carefully kept in the order that they came off the board. I put them away temporarily in bundles tied up with shrink wrap tape.


Next was to go back the the lighter coloured cedar. I ran each of the sawn strips through the thicknesse to bring them down to 16 mm and also to clean up one narrow edge - I should have done this while the original board was still intact. Saw these was easier because I could use the finger board to keep the stock against the fence and it was just a matter of feeding them through the was. Again I kept them in order and bundled them together with shrink wrap.

When they were all cut I laid them out in the order I had cut them. This is what they looked like.Each of the 8 pieces gave me 7 strips, 56 in total. In the photo every 7th strip is darker  because it was closest to the surface of the slightly weathered board. This discolouration sands away so wont be visible in the boat. Apart from that there is no discernible pattern so the strips can be used in any order.

I expected the strips from the wider darker coloured board to show a more obvious pattern - the original was flat sawn and had some very distinct grain on the wide surface. The vertical strips did have some variation but after hours of trying slip matching and book matching I could bring out any patterns that extended further than a couple of strips so I gave up and took those that were most evenly matched in colour.


In the photos below are the strips laid out as they will go on the boat. All flat and then in some racks to keep them in the order that they will be used and in a smaller space.


The strips on the left are for the deck (above the waterline). on the right are the strips for the hull (below the waterline). The first strips to go on the boat are from the part line (where the hull and deck are separated to get them off the building frame) down to the waterline. The lighter coloured strips form the rest of the hull below the waterline.

Out off the 146 (90 dark + 56 light) strips I cut about 94 (52 +42) will go into the boat. This leaves me with a bit more than half the strips needed to build another boat.

Several lessons learned about preparation of rough sawn stock and, before I start on another strip sawing epic, I might buy a power feeder for the tablesaw!

But I now ready to go on - next job to cut and fit the inner stem and stern pieces.


Tuesday, 24 March 2020

First Steps, Frames, Strongback and Workbench.

With the plans in hand there was a flurry of activity which involved a lot of driving around Brisbane. First stop was to get the plans copied followed by an aluminium supplier to buy a 12'6" (3810mm) long piece of 100x50mm box section for the strongback.  I also called at the timber merchant to see what they had in the way of cedar for the strips. Seemed to be a lot of other stops for miscellaneous stuff, more PVA glue, lots of tape, small squeezy bottles to decant the glue into, new blades for bandsaw, table saw and thicknesser, the list seemed endless.

Back at home I cut out the frame shapes from the copies of the plans and glued them to some 12mm ply left over from a previous project. Then spent a couple of hours standing at the bandsaw cutting them out, all 16 of them plus the supports for the stem and stern. Here they are .


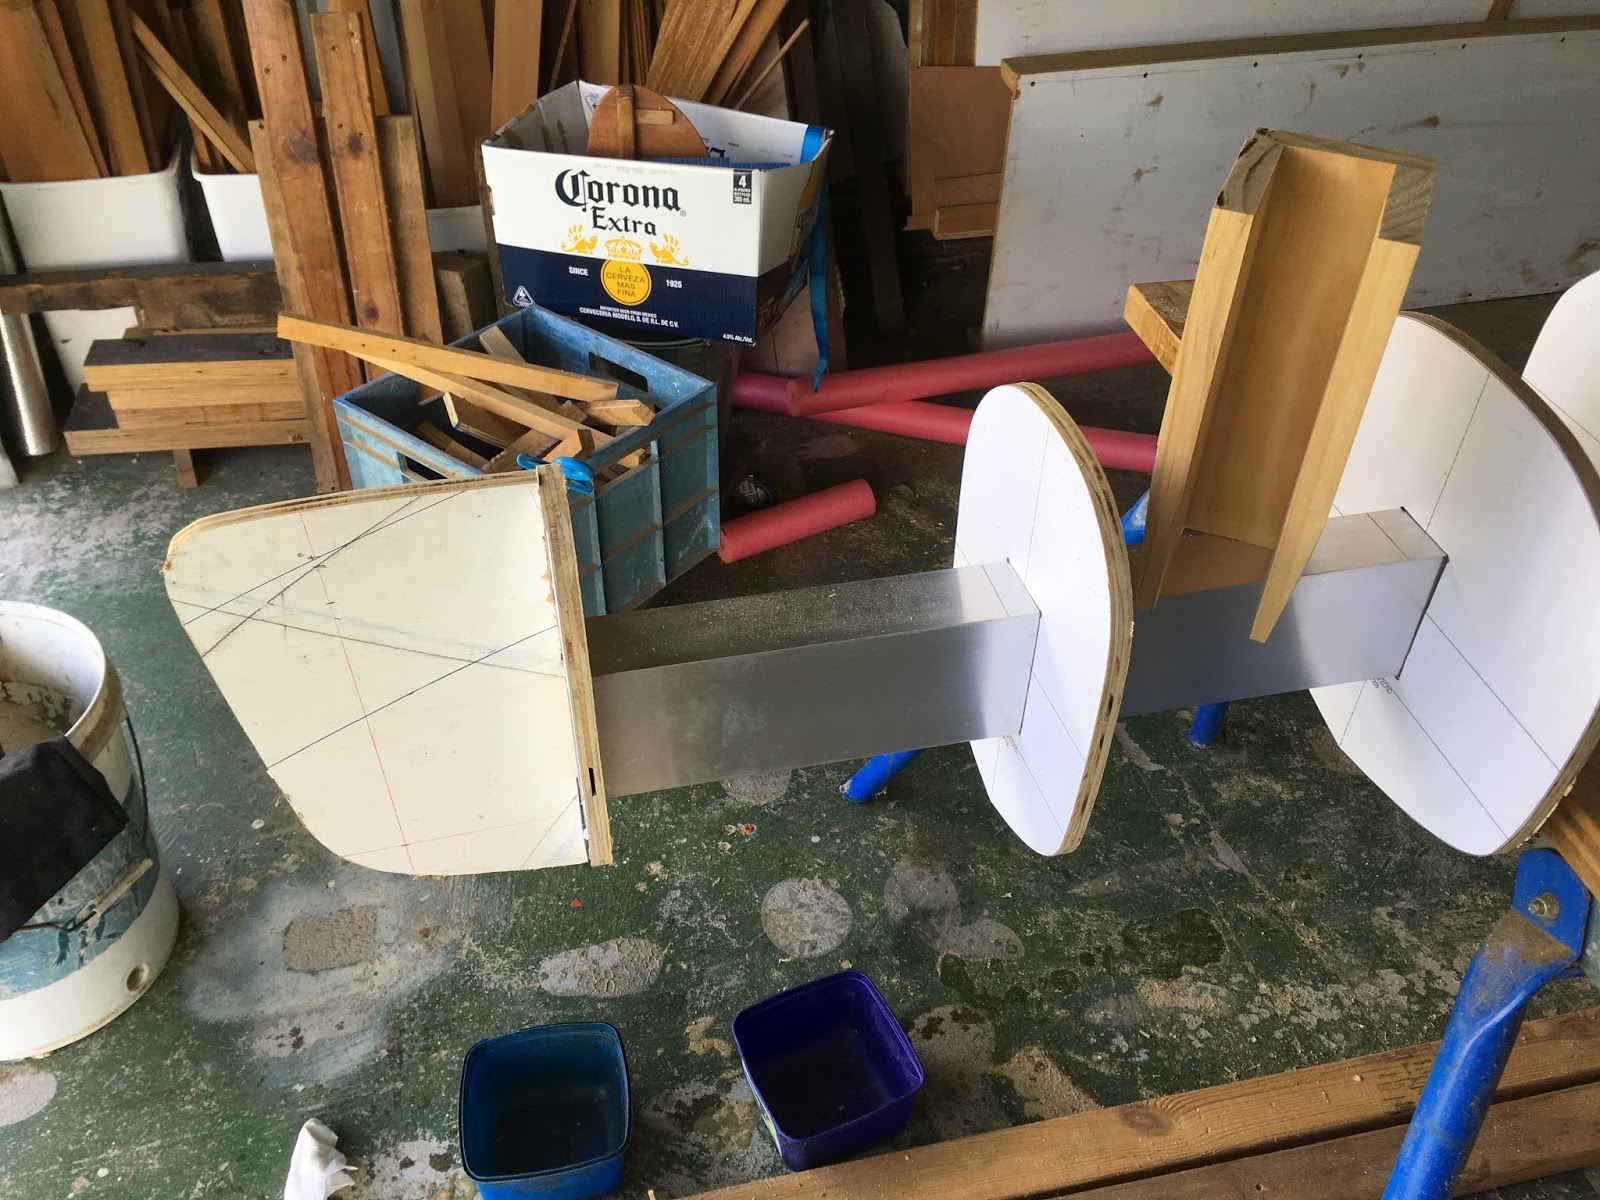
Each of these frames needs a 100x50mm hole to be accurately cut in it to fit the aluminium strongback which is resting on the saw horses behind the frames. The patterns are imperial so the hole is 4"x2". I considered various approaches to doing this and in the end drew the two rectangles with the centrelines on my computer and then printed out 15 copies on some thin paper that I could see through. I cut these up and carefully taped them in place on each pattern. Then I roughly cut the holes out with a jigsaw. I made an accurate template from scrap ply with a 100x50mm hole in it to be a nice sliding fit on the strongback. This template was placed over each frame, fixed in place with 4 brads and the hole in the frame cleaned out with the router using a straight bit with a guide bearing. This left holes with round corners but a file soon fixed that. Here are the frames on the strongback. Looking at the bow.
And at the stern.

Here's the bow frame inserted into the end of the strongback with packing pieces either side of it to keep it centered. Screws through the aluminium fix the bow and stern frames firmly in place. The imperial plans bite again here - the frames 1/2" think should be 9.5" apart (10" from reference face to reference face).  I made up some U shaped channel out of 90x19mm pine and cut off 15 pieces 242mm long. One of these is standing on the strongback.


The spacers keep the frames the right distance apart and at right angles to the centreline. In the middle of the boat one of the spacers is modified to accept two wedges. These two wedges hold the frames firmly in place.


With the strongback resting on the saw horses the whole boat would have been too low for me to work on comfortably so I built a raised bench to support the boat at a more convenient height. A couple of 70x35mm lengths of pine a more scrap 12mm ply gave me this. It looks a bit wobbly but the table is bolted to the sawhorses and is quite firm.


Here's the boat sitting on the work bench. I will probably add a shelf along either side of the boat to keep tools,  glue etc close to hand.


Just visible on the floor behind the sawhorses is the timber for the strips. I brought the timber home on one of my boat trailers. The light coloured piece is 200x50mm Western Red Cedar  and the darker pieces are 320x30mm Surian Cedar. Light colour below the water line and dark above is the plan.


The Surian Cedar is flat or back sawn and it appears from the grain pattern that these two pieces were adjacent in the log.

Next step is to start cutting these three pieces of timber into lots of strips.


Sunday, 22 March 2020

The Plans Arrived.

On  10/3/2020 the package from Nick Schade at Guillemot Kayaks  arrived.  Since then I've been working slowly, gathering tools and materials for the boat. In the package were the plans, a Roboplane, and Nick's book.


The Roboplane is a holder for the Veritas Mini Shoulder Plane. In the second photo the plane is  positioned in the Roboplane and held there by two rare earth magnets. This tool is used to plane a bevel on the last  strip fitted on the boat to allow the next strip to fit with no gaps.


Nick's book contains a wealth of information on strip planked boats and includes complete plans for 3 boats.  Another important source of information is the series of 69 videos made by Nick covering the complete built of a microBootlegger Sport.


The last items in the package were a T-shirt and cap. Now I have no excuse to not get on with the job.